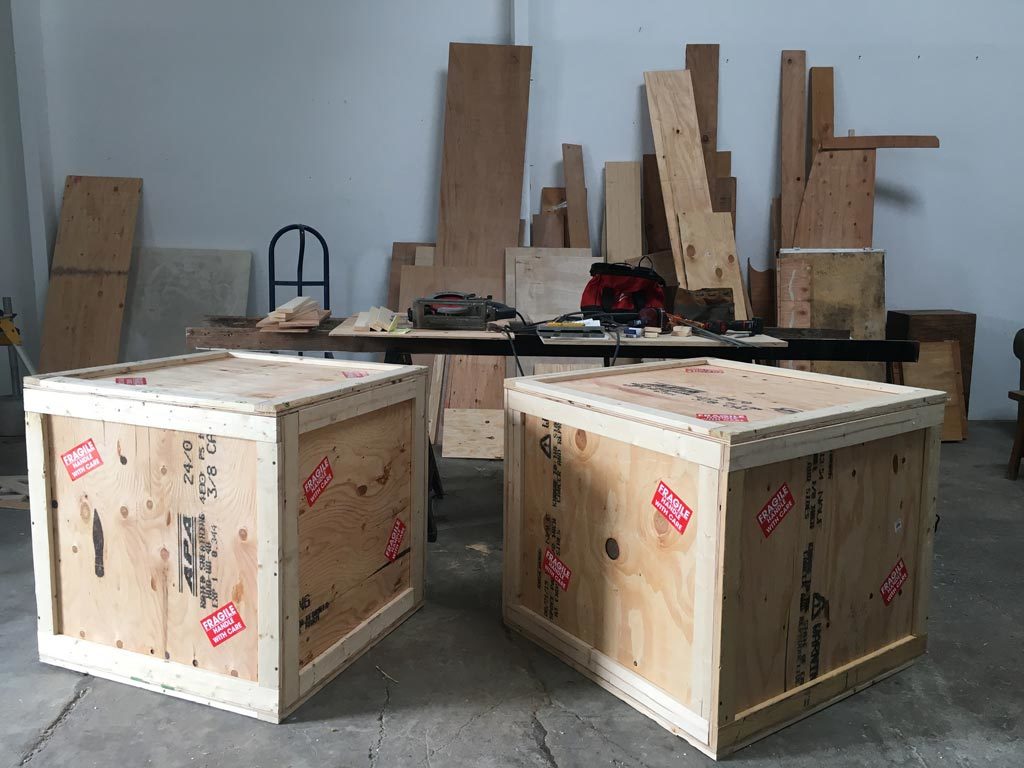
Well, hopefully there’s no actual busting of these crates as they make their way to Gainesville Florida!
In these two boxes are all the parts for my site specific installation of the Bone Series for the University of Florida Gainesville’s Career Connections Center stairwell. They will head out next week and I’ll be following behind them at the end of the month. Welcoming all fingers crossed as these guys head out on their cross country road trip!
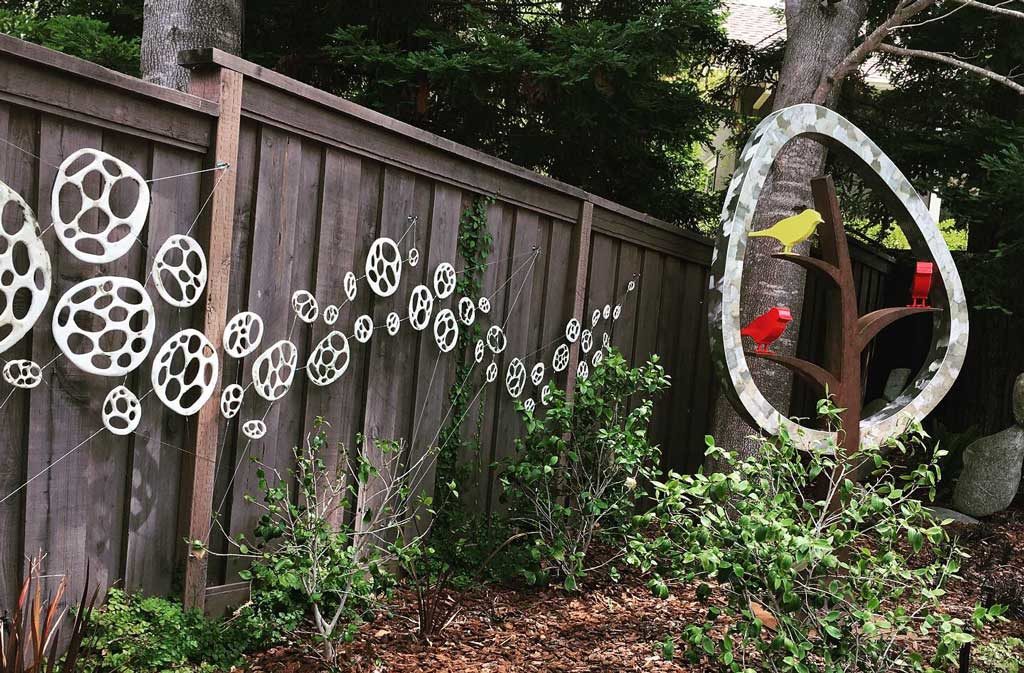
As many of you know, I’ve been working on a big public art project the past few months, but what you may not of been aware of is I was also simultaneously working on two custom commissions for a private residence. And they just went in this week! I’m thrilled to share the results with you and so grateful for the opportunity to have my work in this gorgeous space.
A whole bunch of Umbels dot the shady area of the yard like colorful fallen fruit in varying shade of yellow and ochres with little bits of red accents and the Bone Series wave wiggles down the fence line leaving gorgeous shadows in the late afternoon sunlight.
We have become so accustomed to ‘shipping and handling’ being a free bonus to the bottom line of our online orders, it’s easy to forget that there is a person on the other end. Someone who actually protects your purchase, puts it in a box, makes sure it gets to your home and (hopefully) arrives there in one piece. And ok, shipping has human power and fuel costs associated with it that seem obvious to be worthy of paying a fee for but ‘handling’ ceramics is a much finer art form that often can go unnoticed.
Over the years, shipping my art has become such an adventure in itself, that I could sit around telling the equivalent of ghost stories around the campfire about the things my art has been through in the shipping industry. The piece that gets chipped or lost is one kind of tragedy, but when I’m planning on shipping a huge, multipart installation, the balance between risk and cost effectiveness could fall into a whole other kind of tragedy. So much so that I’ve dedicated weeks in my planning schedule to just work on the art of shipping and handling of this upcoming public art piece. Exciting stuff, right?
There are options. I could hire a professional art shipper to take my work, pack it and ship it. It would probably arrive in perfect condition. All I would have to do it pay a huge bill for that piece of mind. I would also have to resolve in my mind that they would be purchasing brand new materials to wrap and protect my work, most likely ones that would not be recyclable, compostable or made of post consumer waste. I struggle with that (and that big bill too). So I choose to pack and ship my work myself.
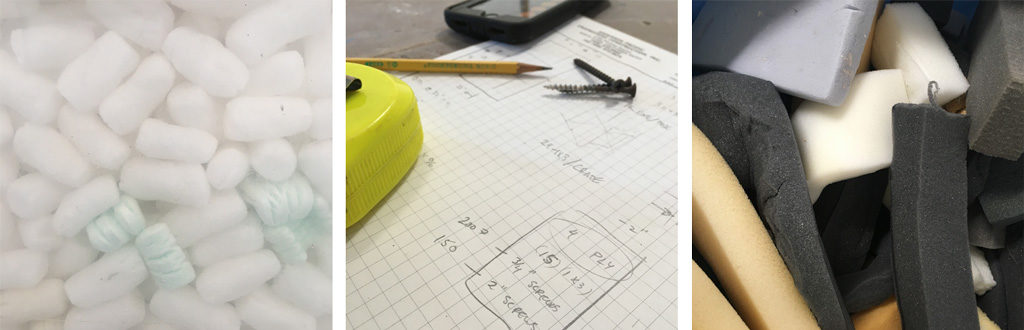
This means that it takes me time to find the right materials to protect the work correctly. I also want the materials to be reusable, recyclable or repurposed as much as possible. I also have to balance all of that with the cost. A reused crate that’s too big for what I need will cost more to ship. Equally, wrapping my work in 1000 pieces of reused bubble wrap might not be the best protection. I also have to consider the person who’s receiving it on the other end who probably doesn’t want all the packing peanuts I’ve ever saved.
So far, on this project, I’ve been able to reuse all the bubble wrap, hard foam, filler material and interior boxes. I did concede that I needed to purchase some soft foam to protect the art properly. Two new wood crates will also be built. They will be designed using all the wood as effectively as possible, so that there is hardly any scrap leftover. They will also be as small as possible while still protecting the work inside. Since these crates and packing material won’t be returning to my studio, I plan to contact the art department on campus where I’m installing for first dibs on the free materials. No matter what, I don’t want them to end up in the land fill after I’m done with them.
Why do I share this ramble with you? Mainly because this is what’s going on in my studio (and brain) right now and the struggle is real! But also to offer a little behind the scenes look at what those handling fees really mean. To think about that artist who took the hours – literally – to package your purchase carefully. The artist who wrote you a little thank you note or doodled a little drawing on the box. To remember that there is an art to shipping and handling and that these skills and those materials are what you are actually paying for.
ps: Keep your fingers crossed that everything arrives in perfect condition! Thx!
Lately, I feel like my blog posts are like groundhog day, still working on the same public art project again and again but every day, progress is being made! Plane tickets have been purchased, installation dates have been scheduled and crate building has started happening – exciting times in the studio!
I’m still working on the final wall section of the installation, mainly because I realized that I needed to make some more parts but those are firing through the kiln as I type and by the end of next week all sections should be finished. It’s definitely thrilling to have been offered a project like this, but I will be equally thrilled when it’s complete!
As many of you know, I was accepted to be an artist in residence at the Yinnge Ceramic Museum in Taiwan starting in October, so I’m simultaneously planning for leaving my studio for 3 months right after this public art project is completed. Sometimes I feel like I’ve got to many balls in the air but I’m trying to find balance by still spending time in nature as much as in the studio, taking the time to breathe and reminding myself that ‘I’ve got this’. Thanks for being along on this journey with me!
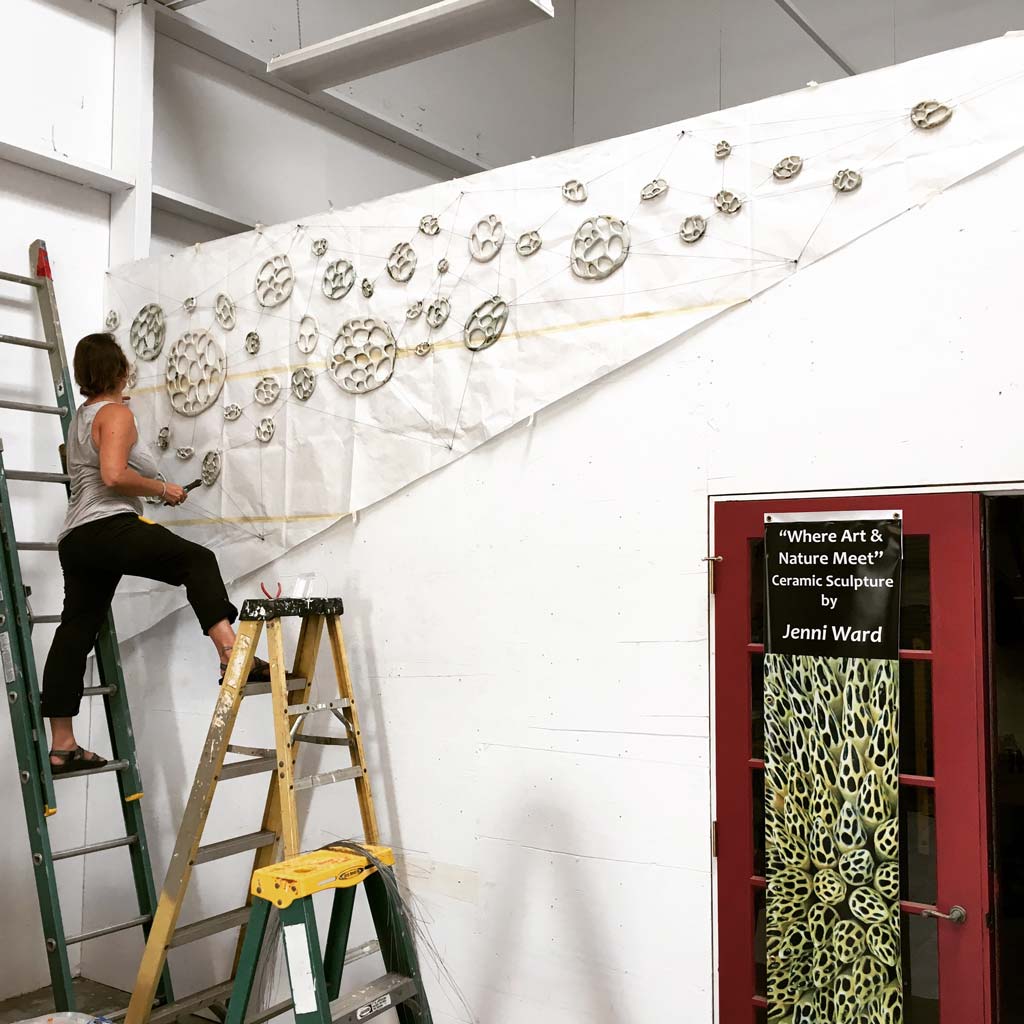
These are just studio shots of my work-in-progress public art project, so please pardon the dirty walls! I wanted to share all of the progress I’ve made on this project, dare I say that I’m in the home stretch!?! …well, with the building and assembling part of the project anyway… there’s still crating, shipping AND installing to go!
I start on the floor laying out the ceramic discs in a composition that I think will work best for the space, then I start connecting all the pieces together with the steel cables. Once I have a good idea of where the connection points to the wall will be, I will group a few tails together and assign them an anchor point. Then the paper template goes up on the studio wall and I place the anchors. For now I’m just using screws in the wall, the final installation will have some really nice eyebolts for anchor hardware. Then I start to hang the crazy web of parts, it’s a little tricky since everything is moving and could break if they knock into each other.
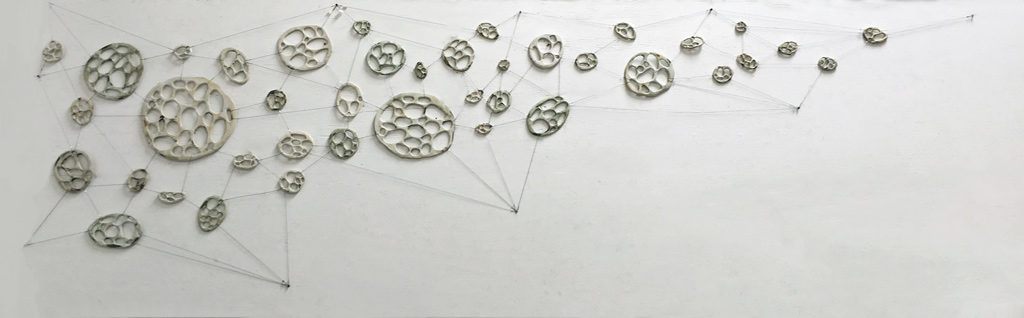
Next up is the editing process, adjusting of all the cables to be functional and visually dynamic. Gravity effects these installations in ways that I could never predict when assembling on the floor, so there are always cables to be cut and replaced. Once everything is connected, I usually just stare at them for awhile. I take the time to see if some part catches my eye and needs to be changed or if a piece needs to be added or subtracted. When I feel I’ve got them all in their happy places, I’ll mark the template for the final anchor locations and remove the paper template to photograph them.
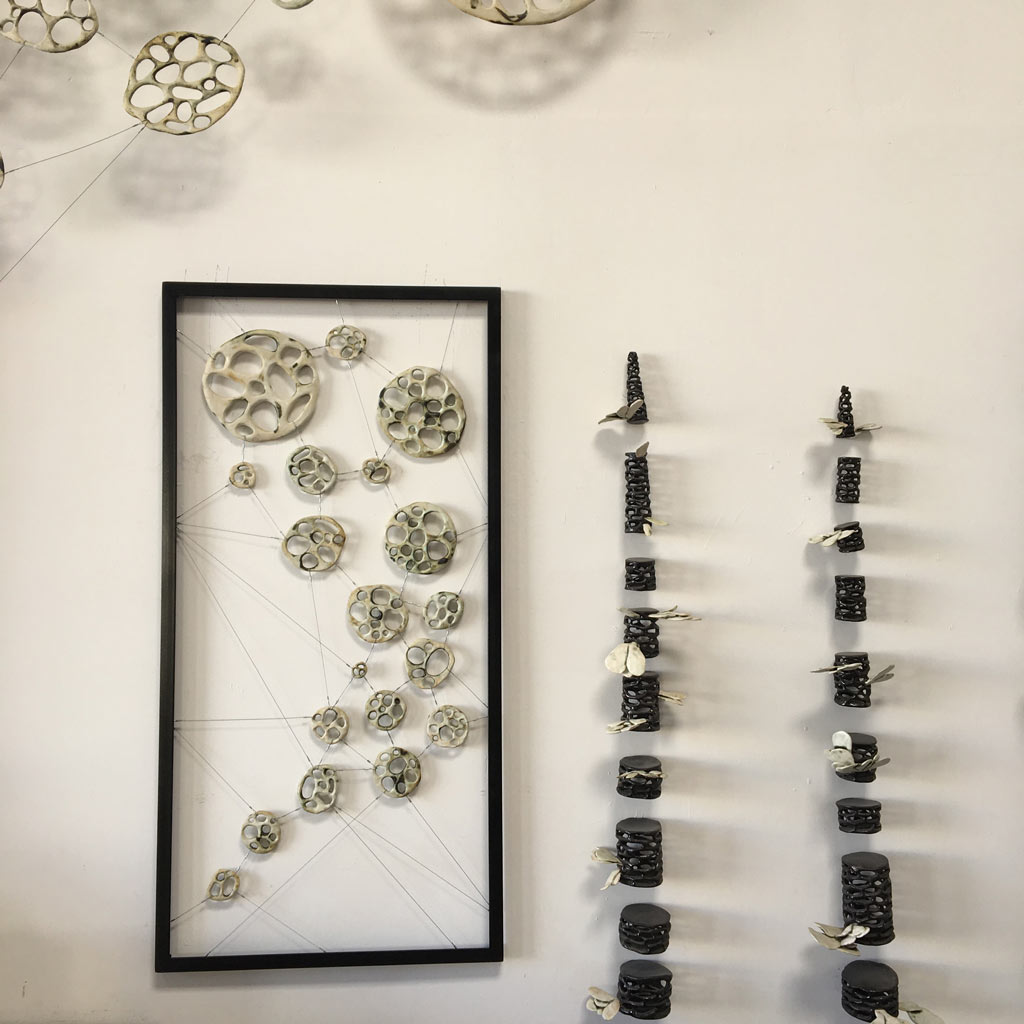
There are 6 installation locations for this project and I’m down to the finishing up the final one, but it’s also the largest one at over 16′ wide, so it will be quite the challenge. Below are some images of the smaller ones that are completed and ready for packing up. Can’t wait to see these all finish in their permanent home soon!
Here’s a little catch up on what’s been going on in the studio these days and why I’ve been posting a little less than usual!
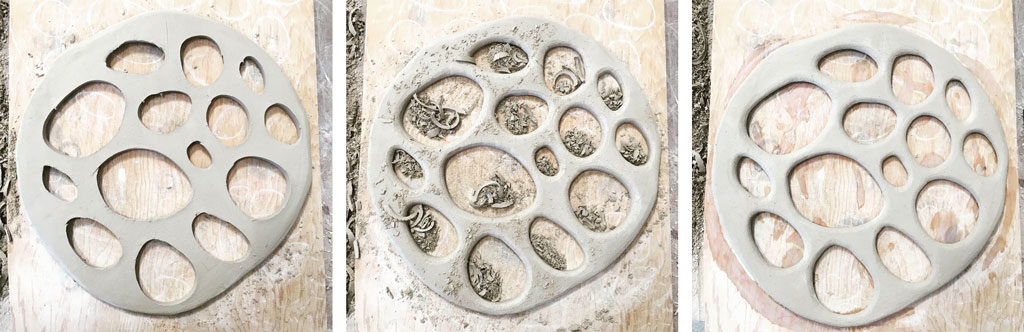
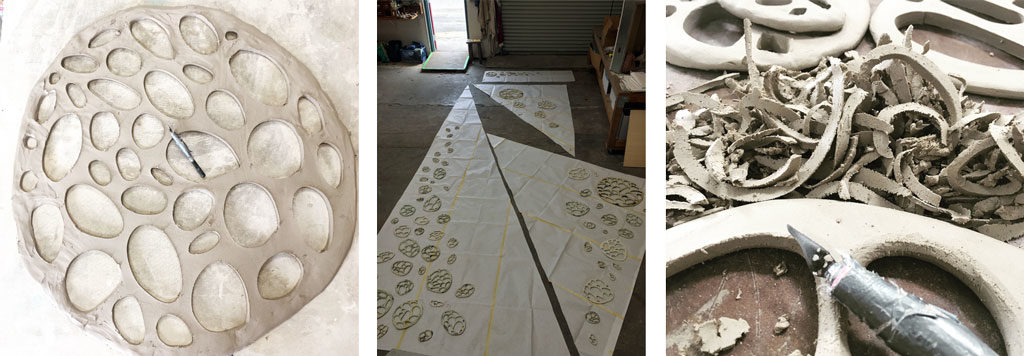
Work on my public art project for the University of Florida Gainesville campus has taken over the studio. All the hardware and parts for the installation have been decided upon and ordered, massive amounts of clay and glazes were picked up and paper templates of the areas art will be placed were made. So, it was time to just start making a ton of parts and now, my days have been filled with hours and hours of carving holes in the ceramic discs. I’ve piled up about 100 finished pieces so far with more still drying or waiting for a ride through the kiln. So I started laying the finished pieces out on the paper templates I’ve made and I’m pretty pleased with the progress so far and I’m looking forward to seeing it installed in September!
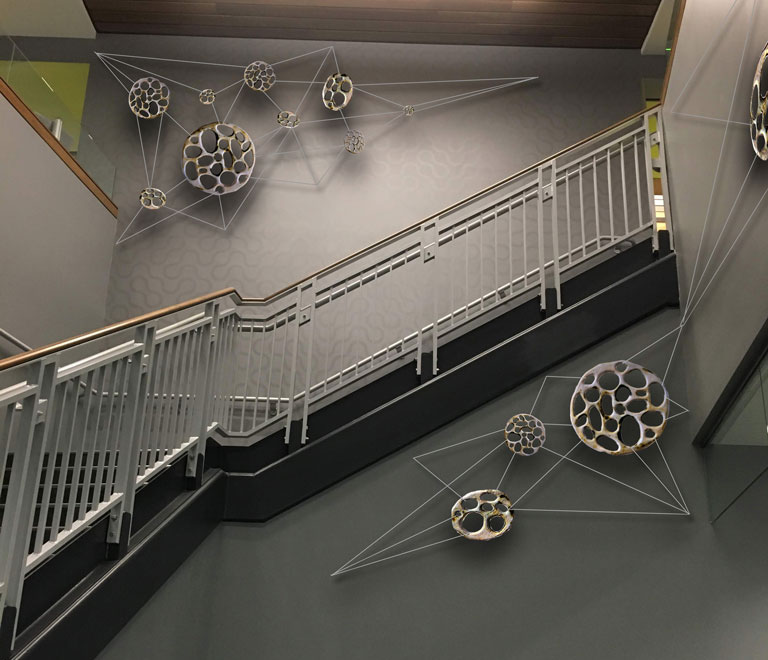
Over the past few months, you may have picked up on little blips about me working on a pitch for a public art project in Gainesville Florida. In November, I was selected as one of two finalists for the second stage of this call for art. I did a site visit in January, meeting with staff, students, and the architects who designed the new space which was based on the theme of biophilia (the human and nature connection). And since then I’ve been quietly getting my paperwork together, organizing my slides, tweaking my budget and drastically improving my photoshop skills to get ready for this meeting. Last Friday was the day to deliver and… I’m so thrilled to announce that I got the contract!
The image above is a photoshopped mock-up of the Bone Series wall web installations in the stairwell of the Career Connections Center on the University of Florida Gainesville Campus. I’ll be using all four walls of the stairwell space to create these installations flowing through the space. I’m so excited to get started on this project and I can’t wait to see it up. Although, it will be many more months of building and designing the exact layout of all the pieces before it ships out and goes up, but I’ll be sure to share my work in progress.
Thanks to everyone who crossed their fingers and sent me positive vibes! It worked!
I’ve come to realize that I’ve been creating posts here on ‘the dirt’ less and less lately, even missing whole weeks altogether. This is usually the tell-tale signs that the death of a blog is inevitable. BUT, I’m here to share or rather admit that I feel like I haven’t had all that much to share lately and that it is NOT the death of a blog but rather a respect for your time to only bring you posts when I really have something to share.
So what have I been doing you ask?
Well, to be honest, the death of my dog Indigo early in the year really drained me of a creative flow and it’s been hard to start new ideas with enthusiasm, but I’m getting there. And so instead of spending tons of time in the studio creating, I’ve been spending time in nature refueling my creativity. I’ve also been working on the not so glamorous side of being an artist; applying for grants, pitching project ideas & prepping for upcoming events – mostly online computer work. Fingers crossed that something creative comes from all this screen time!
I have also been preparing for this fall when I leave for a three month residency in Taiwan, it will be a long time away from my home base and I’m trying to mentally and physically prepare myself and the studio for that length of absence. In the next few months, I have some private art events happening, and the annual Sculpture IS: exhibit will be here before you know it. In the meantime, you can always pick up work in the online shop – especially check out the new Trinket Necklaces!
So, this is not the death of a blog… I’ll be in touch. Promise.
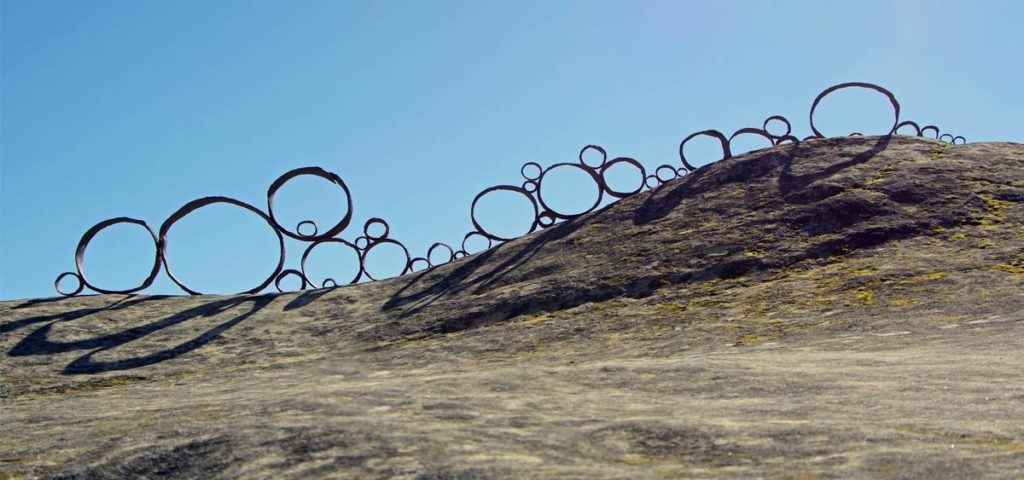
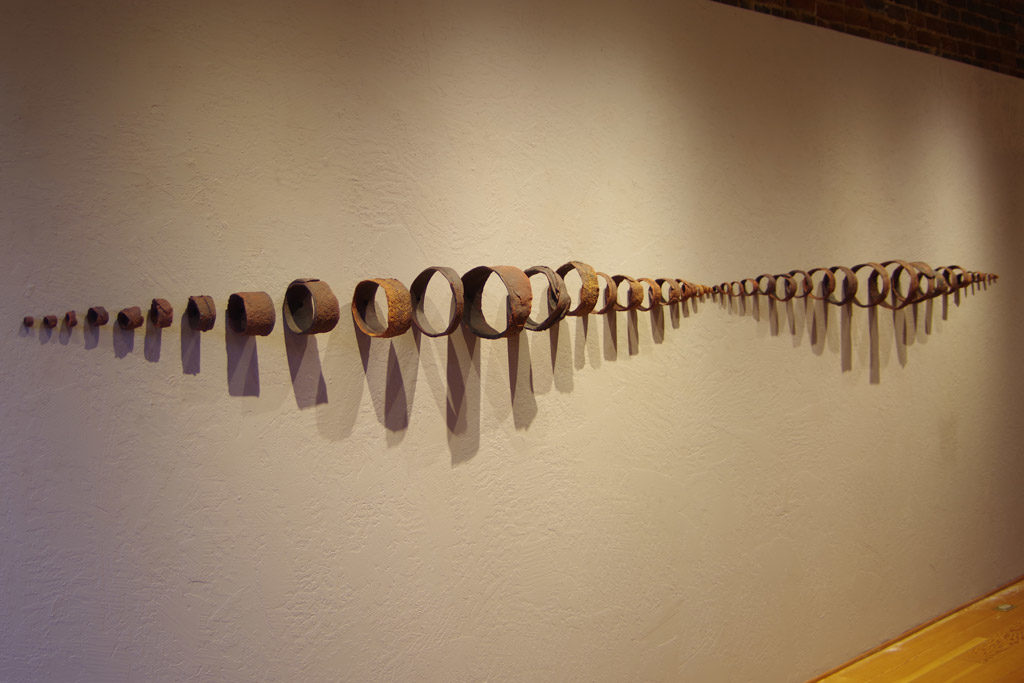
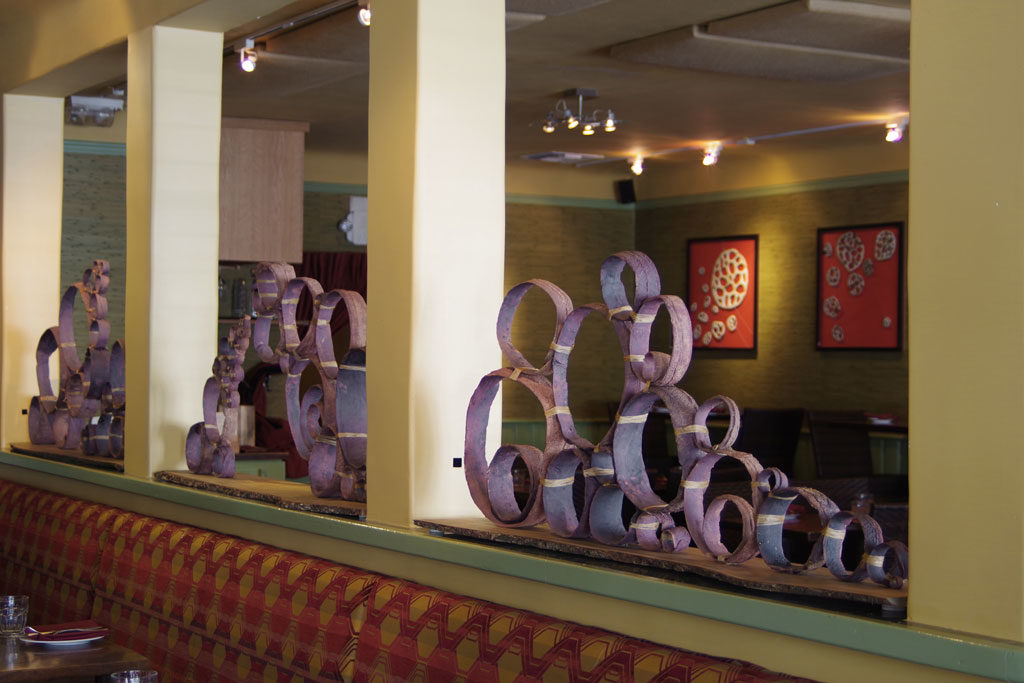
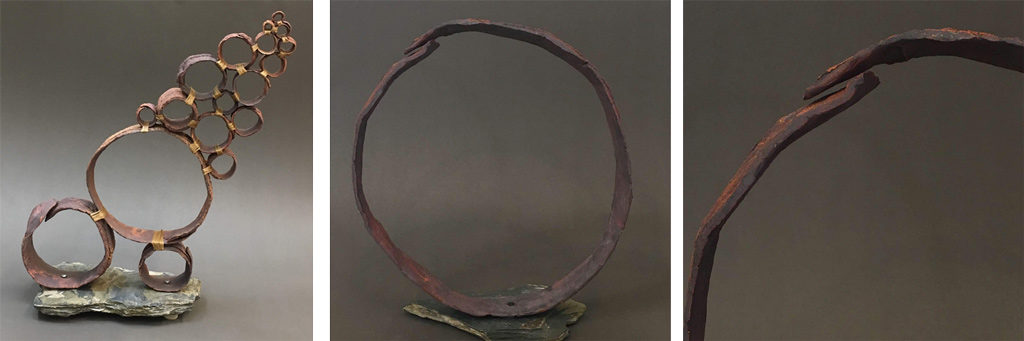
My work tends to go through many transformations in it’s lifetime. These past few weeks I’ve been working on reworking all the parts from the Relic Series. They started their origins as individual parts installed on a rock formation in Los Padres National Forest, then a wall mounted installation for a museum exhibit, then they made their way into a high end restaurant in Los Gatos, now they are being transformed again for an outdoor sculpture garden. The more I go through this process, the better I get to know the pieces and their potential, often it triggers new ideas and results in an evolution of the series. Looking forward to finding homes for these pieces soon and seeing what happens next!
…until the ‘pretty-much-never-happens-sale’ comes to an end. All of the smaller works were snatched up in minutes but there are still 7 pieces from the framed Bone Series still available. And I get it, they’re bigger ticket items, they take up more space, you’ve got to think about it a little longer before investing in a larger more expensive pieces of art- totally understandable. BUT, if you’ve been thinking about collecting these pieces, I promise you that they will never be more affordable than right now- you could even think of it as a BOGO sale and it will only last until the end of March.
ps: need to set up a payment plan to acquire these guys? no problem, just drop me an email and we’ll make it happen!