
When I was teaching at elementary schools, I was rarely given a classroom to work out of, which meant that I had to haul clay, tools, projects and examples classroom to classroom. Over the 10 years that I taught ‘art-on-a-cart’ style, I developed an organized system to make it work without making a million trips back and forth. Here are a few ways I was able to stay organized and mobile…
Cart:
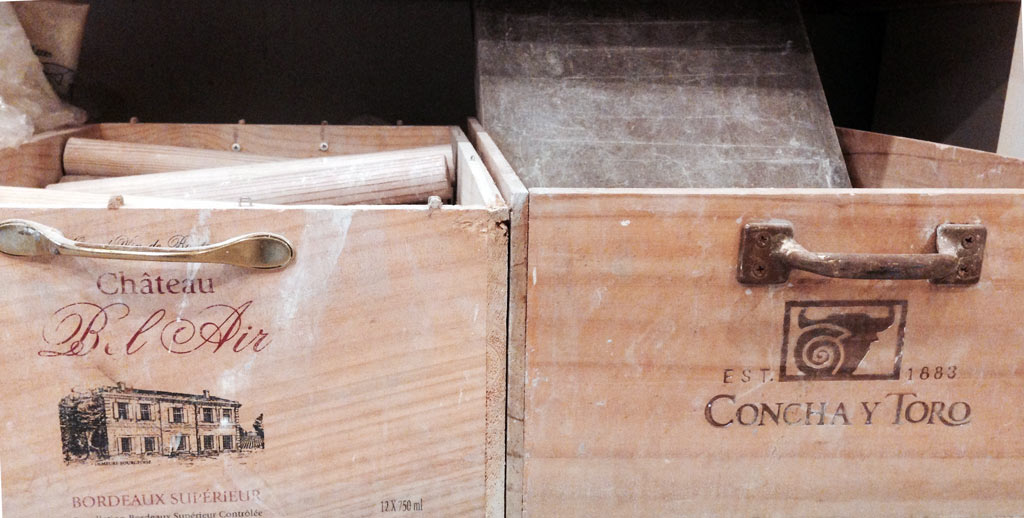
Rather than use a cart, I preferred to use a hand truck to move all of my clay class supplies around campus. I also like to find old wooden wine crates to carry my supplies in and I attach drawer handles onto the short sides for easy lifting and carrying. I could put 25-30 plastic cutting boards (which are each students work area), a hard plastic tub with a lid filled with clay tools and examples of the project we’re working on for the day all into the wine crate. That box goes onto the hand truck first, then I would pile a 25lb bag of clay on top for each class I had that day and I’d carry cardboard boxes that I’d put all of the students projects in. For me, this became the easiest way for me to haul all that heavy stuff classroom to classroom. If I was teaching back to back classes, I would leave the box of finished projects in the classroom so I could move onto the next class. At the end of the day, I’d return to collect the work and move it to the kiln room to dry and fire. In the kiln room, these cardboard boxes could be stacked since they are designed to fit and lock together, which made it space efficient and easy to keep each classroom’s projects together.
Project Boxes:
Costco is a great place to collect boxes that are strong enough to carry clay projects and are stackable for easy storing. I like to find the cardboard boxes that were designed to carry something heavy like melons and it’s even better if they are waxed on the surface since the boxes will last longer holding wet clay.
Typically I could fit 25 – 30 small projects from each class in one box and the box would be labeled with the classroom number and/or the teacher’s name on it for easy sorting. When the pieces came out of the kiln, they could be sorted right back into the correct labeled box. This system made it a bit easier to sort 300+ projects back to the correct student.
Labeling Art:
Keeping track of every student’s piece of art is a tricky task especially when things are going from the classroom to the kiln and back again and when you have some pretty cryptic handwriting in clay. If the kids are old enough and able, I would have them write their names on the bottom of their project and also their classroom number. If the kids were younger, I would have the kids bring me their finished project and I would write their name and room number on it for them and then place it in the cardboard box. I admit that over 10+ years, a few projects seemed to of disappeared into the abyss like a sock in the dryer but with this labeling and boxing system, the majority of projects found their way back and forth to the kiln and back to the correct creator.
Anyone else have other tips for a mobile clay classroom?